How do I completely uninstall VMware Player from Windows 10? Lately I decided to upgrade my VMware Player to the latest version, but it tells the software can’t be installed as a version of the product exists on the PC. I have to uninstall VMware Player before I can install the paid version. I tried to uninstall it via standard way, the Windows Application window, but it told me that I don’t have permission to uninstall. Have you ever been in this situation? How to fix the problem?
VMware Player (VMware Workstation Player) is a desktop virtualization application which allows users to use a second and isolated operating system on a single PC by setting up virtual machine. Virtual machine works as a software container which has the capability to run its own operating system and execute applications like a physical machine. VMware Player provides mature and stable solutions for local desktop virtualization and has been chosen by a number of users around the world. What kinds of people need this tool? Users who need a small sandbox environment for testing or control would like this tool. When users set up and run the virtual machine, they don’t need to reboot the PC and the main desktop environment won’t be affected by the second operating system. It is possible for users to have different privacy settings, tools and networking configurations to keep their host system secure and private.
If users create a virtual machine to let their teams view important data, they can run restricted VM. The data will be encrypted and password-protected. In this way, only authorized users can access the data. It also is a great tool which helps users learn about operating systems, applications and how they work. They can run a server environment on a desktop PC easily without interfering with the host desktop. VMWare Workstation Player only lets users run one virtual machine at a time. To run multiple virtual machines at the same time, or switch to the open source VirtulBox, you will be required to upgrade to the paid version VMware Workstation Pro Player or Fusion Pro.

Despite of a number of advantages and useful functions, some users decide to quit VMware Player for different reasons. VMware Player may consume much of your memory on the system. When users run VMware Player, there are many programs including VMware Authorization Service, VMware Authentication Service, VMware Registration Service, VMware DHCP Service, VMware NAT Service, VMware USB Arbitration Service, VMware Workstation Server and VMware WSX Service etc. running in the background. To use this program, you should ensure you have enough memory to run the 64-bit host operating system. The minimum PC requirements are a 1.3 GHz or faster 64-bit processor and 2GB RAM. If you have 2 GHz and 4GB RAM, the program will run better. If your PC does not meet the minimum requirement, the app takes a long time to respond and always makes the system freeze up.
Sometimes, VMware Player encounters errors and stops working. For example, users see “Error while powering on: Internal error.” Some users complain that they constantly see error like “VMware Player cannot connect to the virtual machine. Make sure you have rights to run the program and to access all directories it uses and rights to access all directories for temporary files.” They try many methods after contacting the customer support, but the error still appears frequently. That is so annoying. Sometimes, the program performs poorly and displays a dreaded MSI error. Some users try to use this program for work, but they don’t understand English and Japanese. Hence, they have to switch to another program. Sometimes, VMWare Player cannot be upgraded directly, and users are required to reinstall the software. However, the software can’t be uninstalled and the new won’t install. If you decide to uninstall VMware Player, you need to uninstall it completely for future reinstalling and cleaning invalid files.
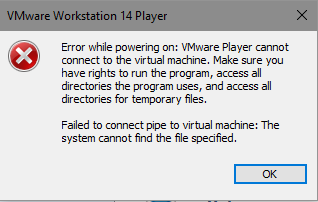
According to a recent research, most users have difficulties when they try to uninstall VMware Player. What problems do you have when trying to uninstall this software? Let’s discuss the commons problems you may have during the removal process. You may not be able to find it on the programs list of Windows removing panel, or get some strange errors or alerts when conducting the removal.
According to some users, VMware Player does not appear on the program & features window. You may try to look for it on settings. However, the “modify” and “uninstall” buttons are greyed out when you select VMware Player in settings for app removal. You may get stuck and don’t know where to continue.
Sometimes, the uninstall button in control panel works. However, the process is interrupted by unknown errors. The most common errors are “You don’t have sufficient permission to uninstall VMware Player” and “the software can’t be uninstalled due improper configuration.” For insufficient permission, you can try to use the same user account which installs the VMware earlier to uninstall it. If the program was installed in an incorrect way or was corrupted, you might need to reinstall the software to finally uninstall it.
Some of you may be able to finish the software uninstalling task. However, VMware Player still can be founded on the PC. Its files and folders still exist on hard disk. Sometimes, Windows’ built-in uninstall tool, “Add/Remove Programs” and “Programs and Features” does not 100% remove VMware Player. Especially when you try to uninstall stubborn software, its leftovers are difficult to remove. They hide deep on system, and you need to locate and remove them accurately.

Most users fail to uninstall VMware Player due to different reasons, so we provide both manual and automatic solution for removal. You can use Windows add/remove feature to remove software and clean leftovers manually. If you are in a rush and need quick solution, you can use Uninstallor to uninstall VMware Player automatically. With few clicks, the software will be deleted completely.
To uninstall software completely, you need to use Windows add/remove feature to remove the VMware files, VMware services, registry entries and various components for the products manually. Hence, there are two parts in this solution. You have to uninstall software first and then clear leftovers completely. There are three methods to uninstall the software at first part.
Part 1: Uninstall Software
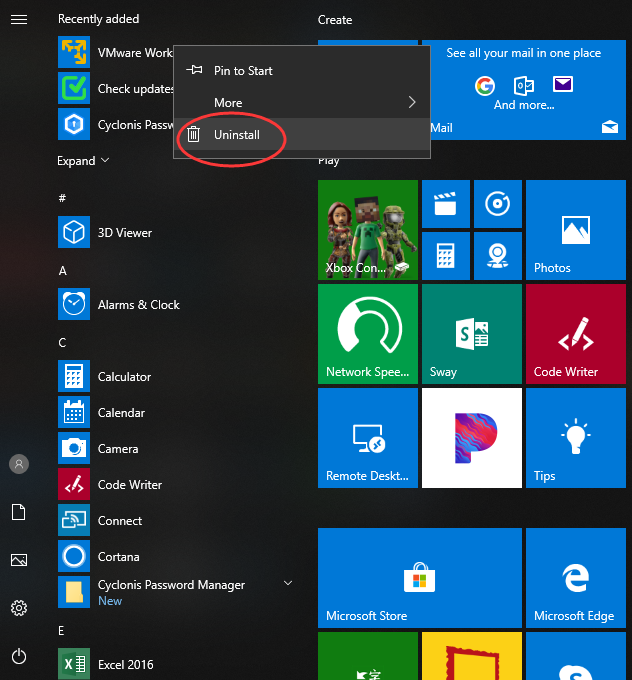
Method 1: Uninstall via Start Menu
Step 1: press Windows key and look for VMware Player on the Start menu.
Step 2: right click on VMware Player icon and select uninstall option. You will be redirect to the “uninstall or change program” window.
Step 3: select VMware Player, and click Uninstall button on the top and confirm the action. Finish the uninstalling process with prompts.
Method 2: Uninstall via Control Panel
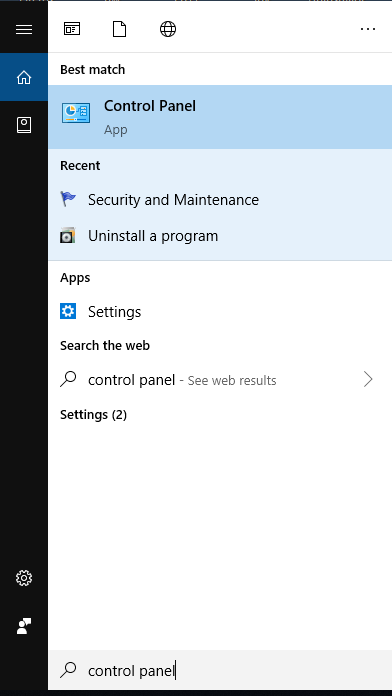
Step 1: type “control panel” in search box on taskbar. Click “control panel” on the popup list to open it.
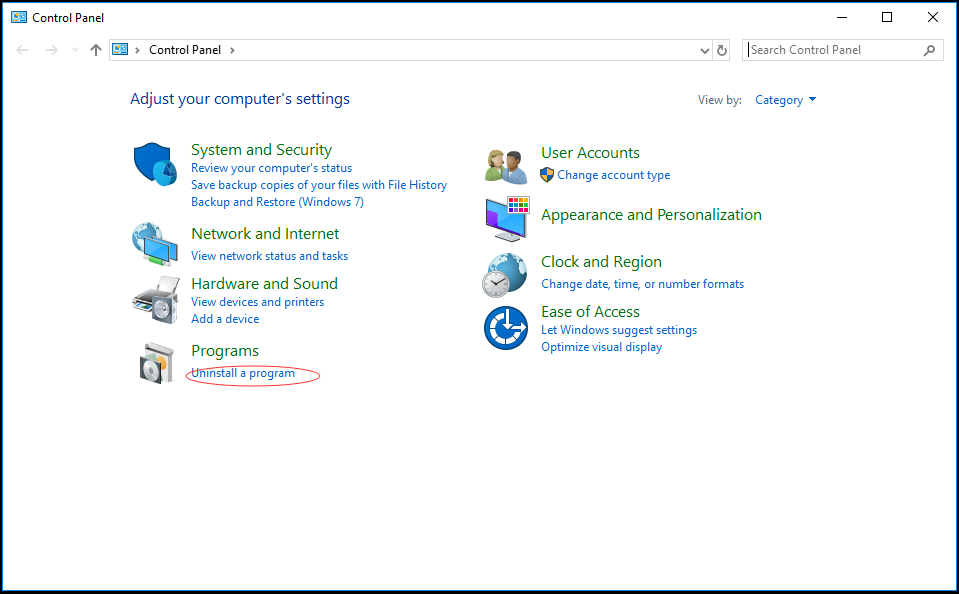
Step 2: click “Uninstall a Program” under Program menu. It will open “Programs and Features.”
Step 3: locate and select VMware Player. Click Uninstall button on the top. If Uninstall button is not available, click Change button and follow the wizard to proceed. When it opens uninstall panel, click Next option to continue the Setup Wizard. Check if you can see Remove option during the Setup Wizard. Click Remove option, and mark all options to uninstall the software successfully.
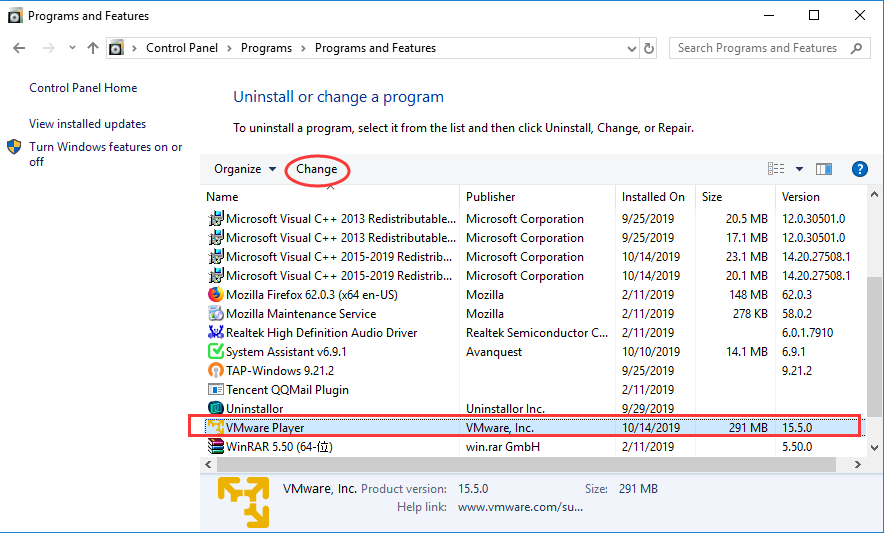
Method 3: Uninstall via Settings
Step 1: click “Start” button at bottom left. At left side of the Start menu, click Settings icon which looks like a gear.
![]()
Step 2: on Windows Settings screen, click “App” menu. Next, select “Apps & Features” tab.
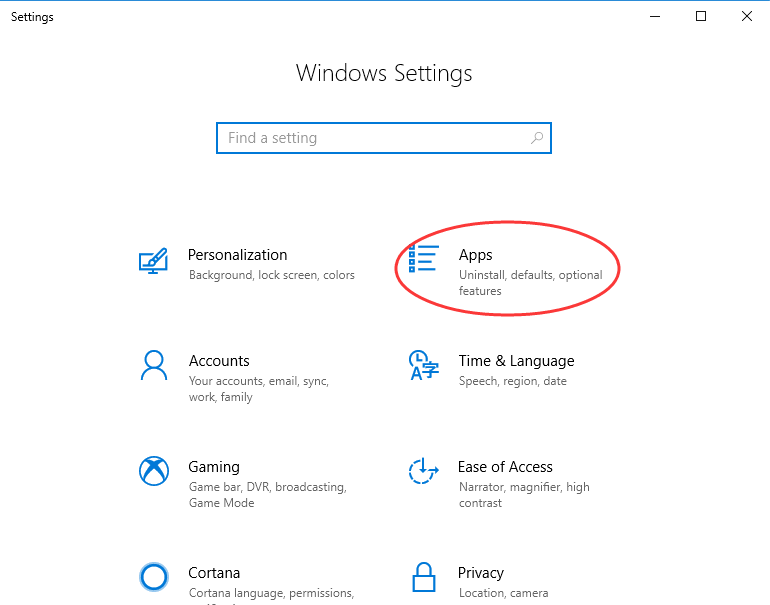
Step 3: scroll down to select VMware Player, and a menu with “Uninstall” and “Modify” will appear. Click Uninstall, and perform the removal with prompts.
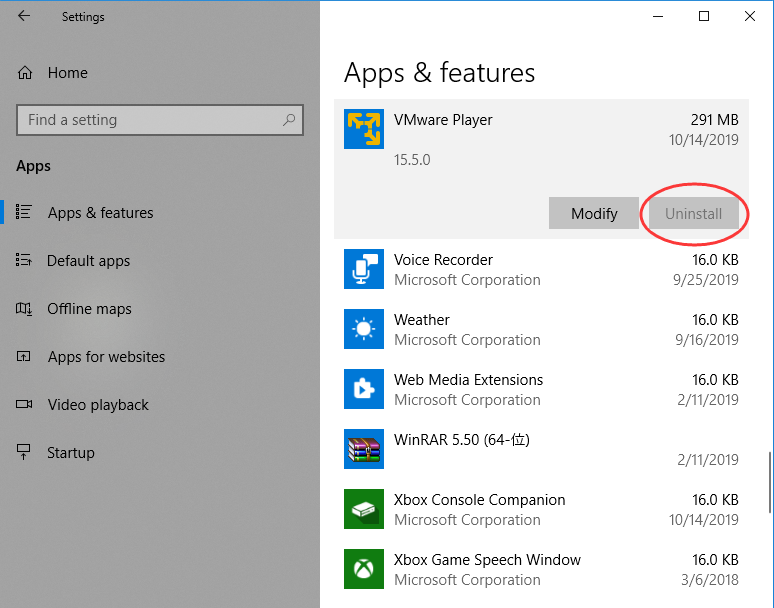
Part 2: Clean VMware Player Leftovers
When you uninstall VMware Player, you only delete the executable files. For complete uninstallation, you will have to clear the invalid registry entries, services and app data manually. That not only lets you free up disk space used by VMware Player, but also helps you avoid software conflict and other issues. Before making any registry modifications, we suggest you back up your registry data to avoid issues caused by wrong operations.
Firstly, press Windows +R keys. A dialog will appear.
Secondly, type “regedit” in the blank and click “OK” to open Registry Editor.

Thirdly, press “Ctrl” + “F” keys to open search box. Type VMware Player and search for results. Unfold the registry group to accurately locate the VMWare Player registry. Right click on related files and folders, and click Delete option. Locate all invalid registry entries and delete them one by one.
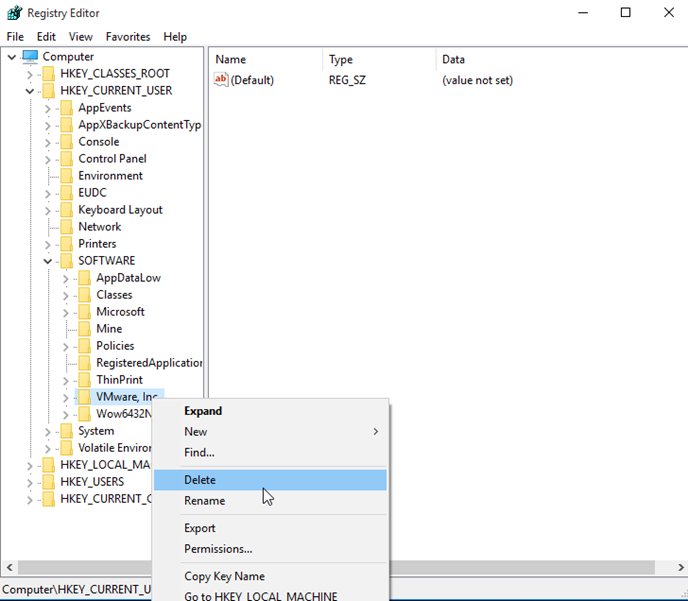
Lastly, click My Computer and select Tools tab. Click Folder options and select View tab. Choose Show hidden devices from the View menu. Click Apply, then OK and exit the window. Next, search for VMware Player on your hard disk. Remove all founded items.
If VMware Player still won’t uninstall after trying all the methods. You will need the third-party uninstaller. Uninstallor is a powerful utility which helps you uninstall VMware Player within two minutes. You only need to tell it which program you would like to uninstall, and follow its wizard to proceed. There is no need to locate and clean leftovers manually. Uninstallor will do the entire job for you.
Firstly, download and install Uninstallor on your PC. Uninstallor is lightweight and easy to install.
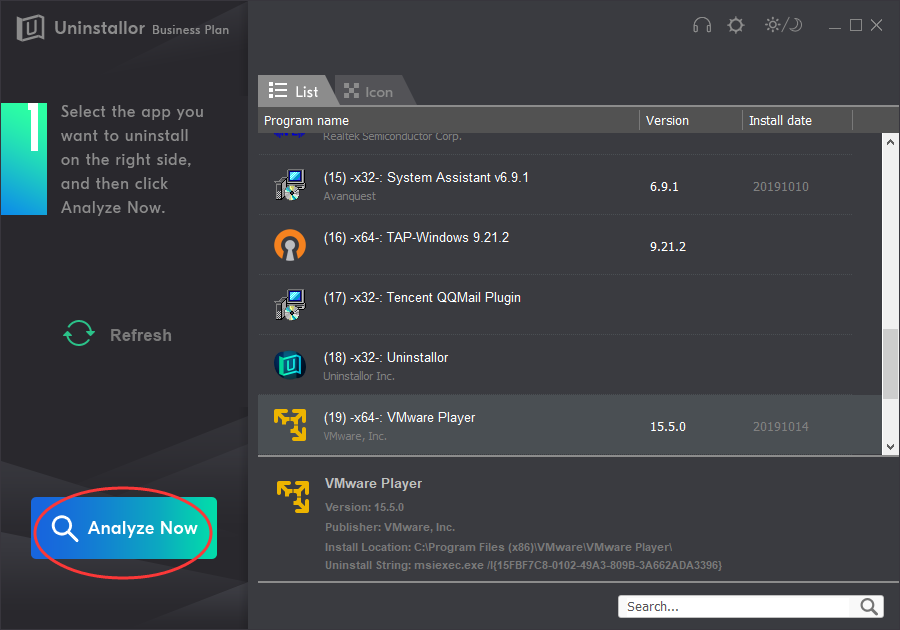
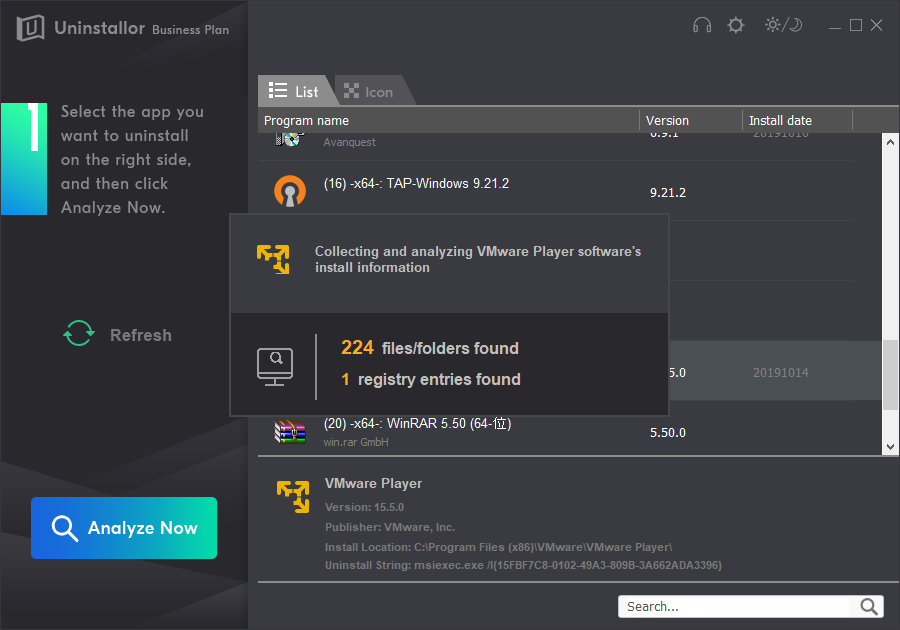
Secondly, once you run Uninstallor, it loads the list of software you install on the PC. Scroll down to select VMware Player and click “Analyze Now” button. The program will provide the best solution to uninstall VMware Player after analyzing it.
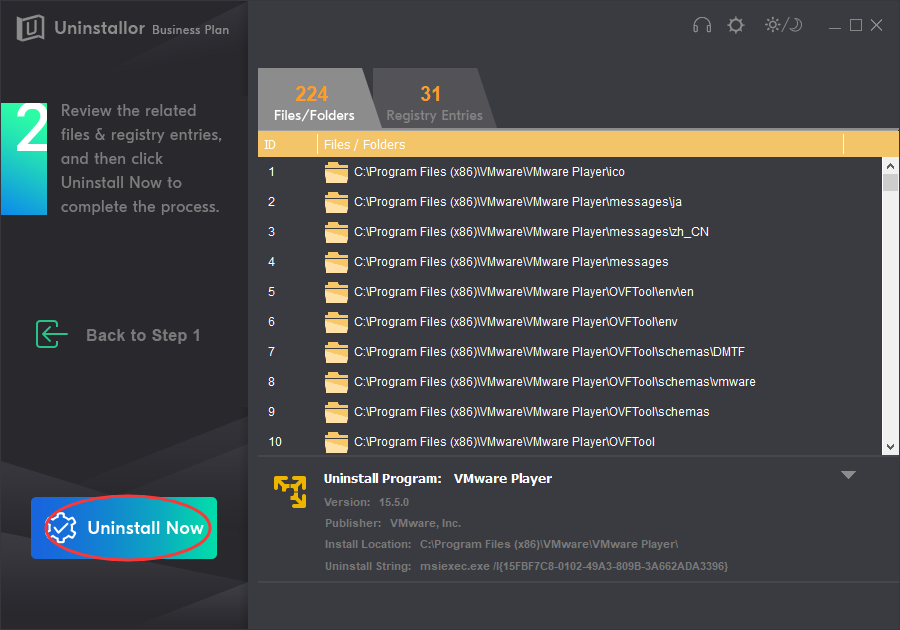
Thirdly, click “Uninstall Now” button, and the program will uninstall the software and locate leftovers for you automatically.
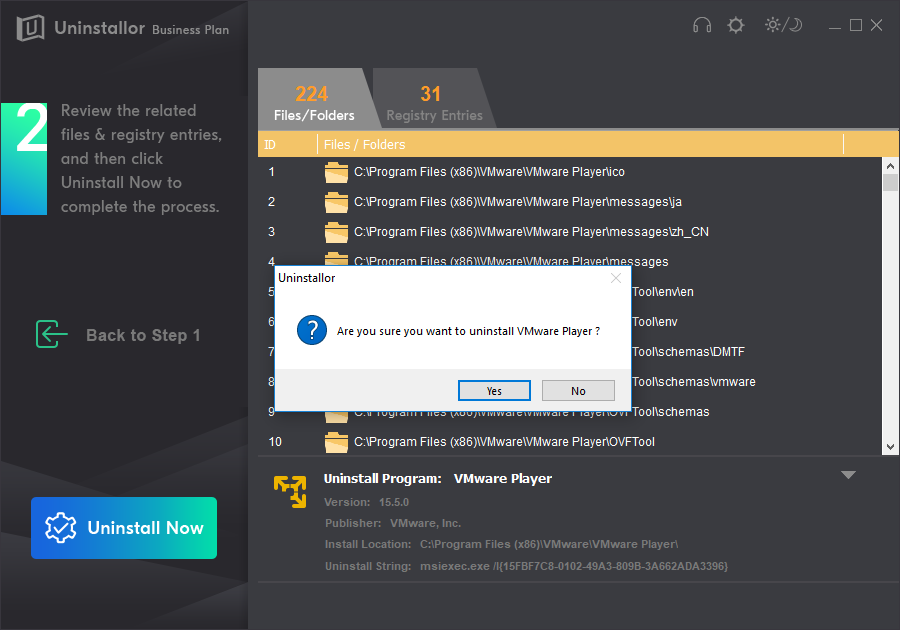
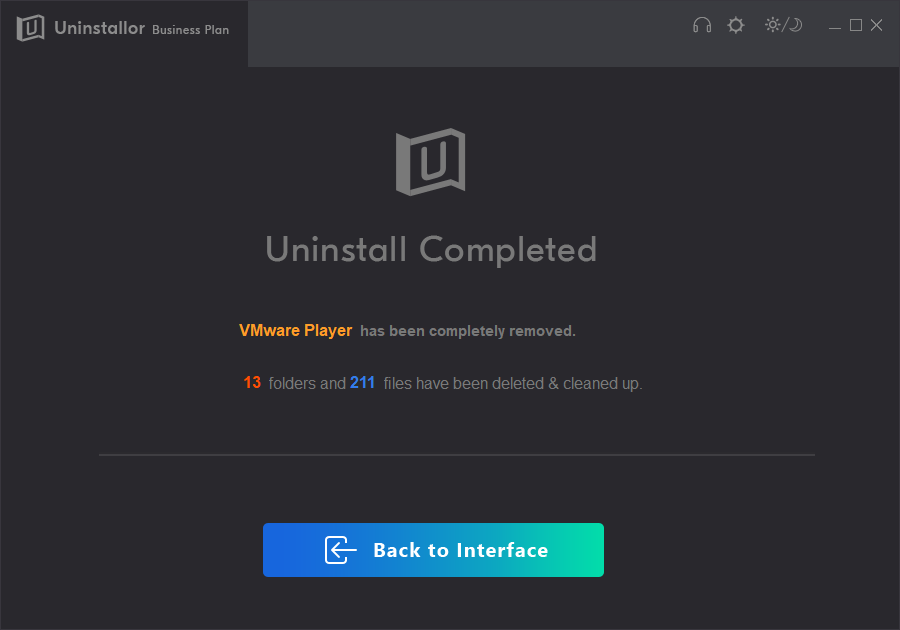
Fourthly, simply click “Remove Now” button to clean all associated files and folders. In this way, VMware Player is completely uninstalled.
Based on your own situation, choose manual or automatic solution to uninstall VMware Player. If you choose manual solution, simply follow our step-by-step guide to proceed. If you are not good computer, the manual solution may not suit you. On one hand, it does not guarantee a successful and 100% removal. You have to locate and delete all associated folders and files. On the other hand, it requires computer skills and patience to edit registry data. If you removed files of other applications or system programs, it could cause blue screen, application crashes and other serious problems. We suggest you seek help from computer experts or use a professional uninstaller. Uninstallor is an excellent option because it includes software package, custom fix and remote support. With few clicks, you can uninstall stubborn, problematic and unwanted software without any problem.
Published by on November 29, 2019 9:08 am, last updated on December 27, 2019 2:22 am


Leave a Reply
You must be logged in to post a comment.